|
In the Previous Post, I've explained how to setup Palo Alto VMs in the same resource group including the network configuration and other configuration. In this post, I will explain how to configure the Active and Passive Node from Azure side Take a Look on the below design which is shared on Palo Alto Portal, as we will follow almost the same 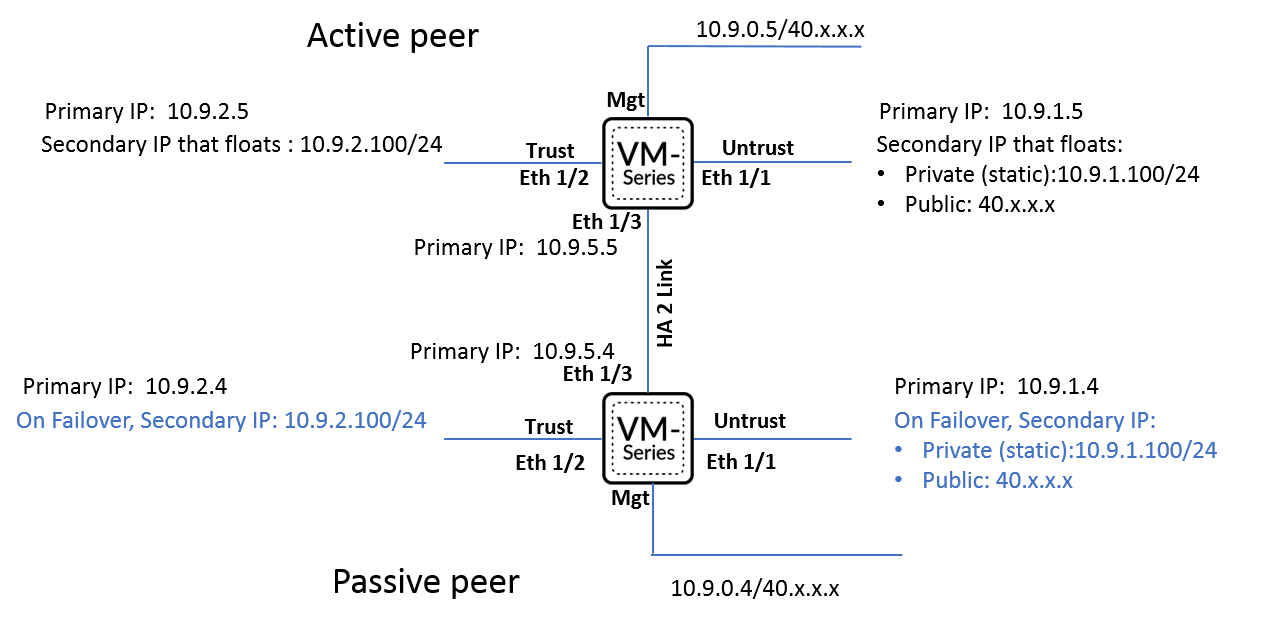 As we can see from the below NICs Configuration on my Palo Alto Nodes, we have:
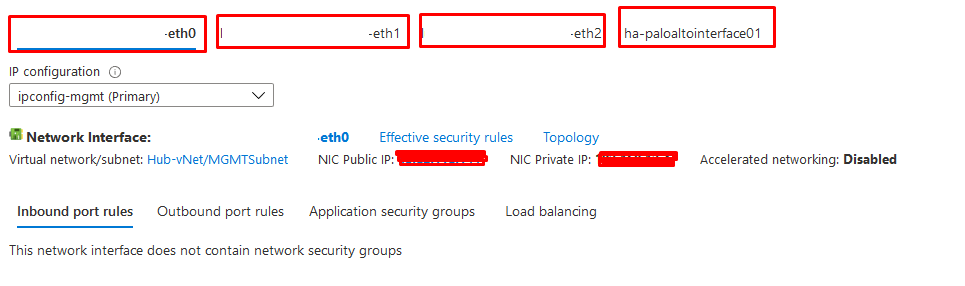 There is a small configuration should be done on azure AD before jumping into the Palo Alto HA Configuration, which is creating an APP and register with the right permission in order to make the Resources "IP" floating between both Firewall Nodes, let's do it: 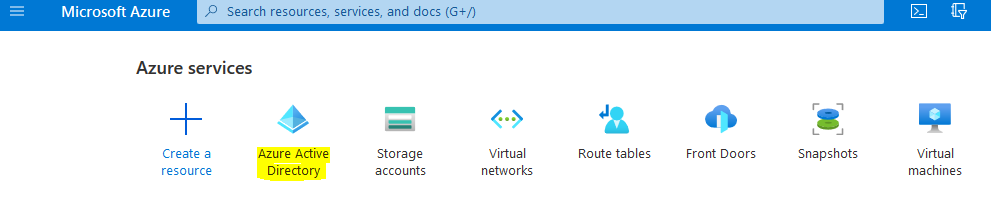 3- From App registration > Click on +New registration 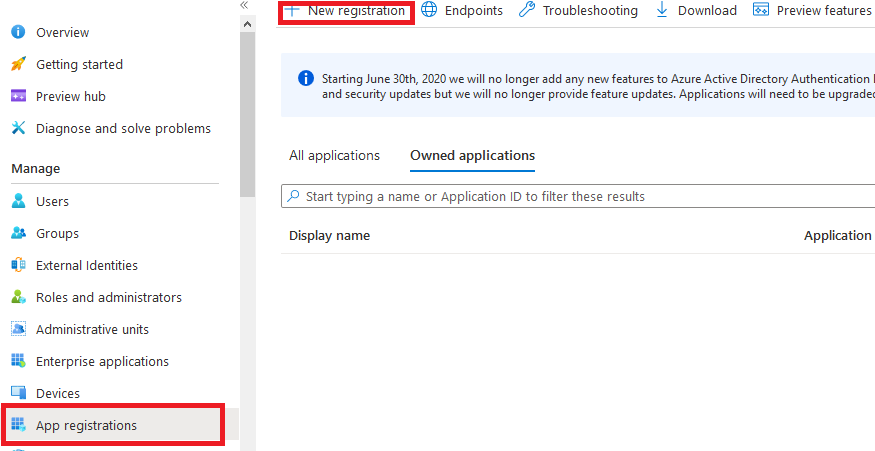 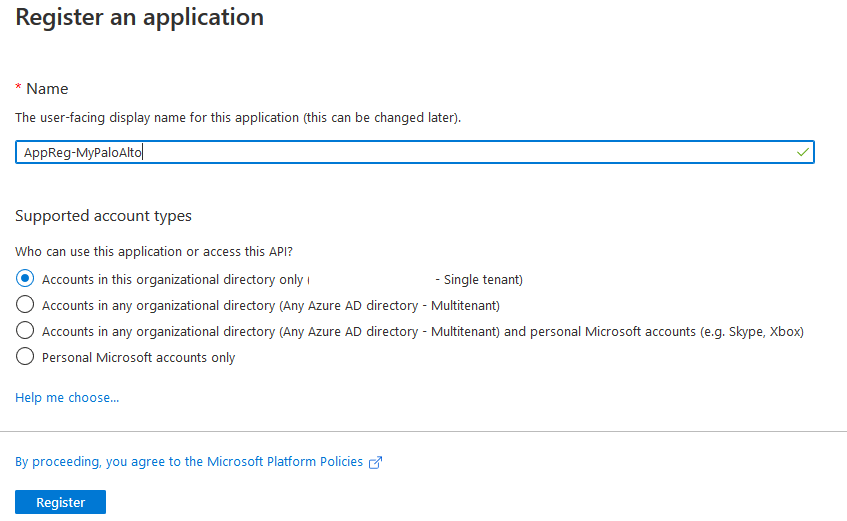 4- Enter the App name and you can leave the rest of the options as a default, once App is created make sure to write down these configuration (highlighted in Yellow) as you will use them in Palo Alto Configuration 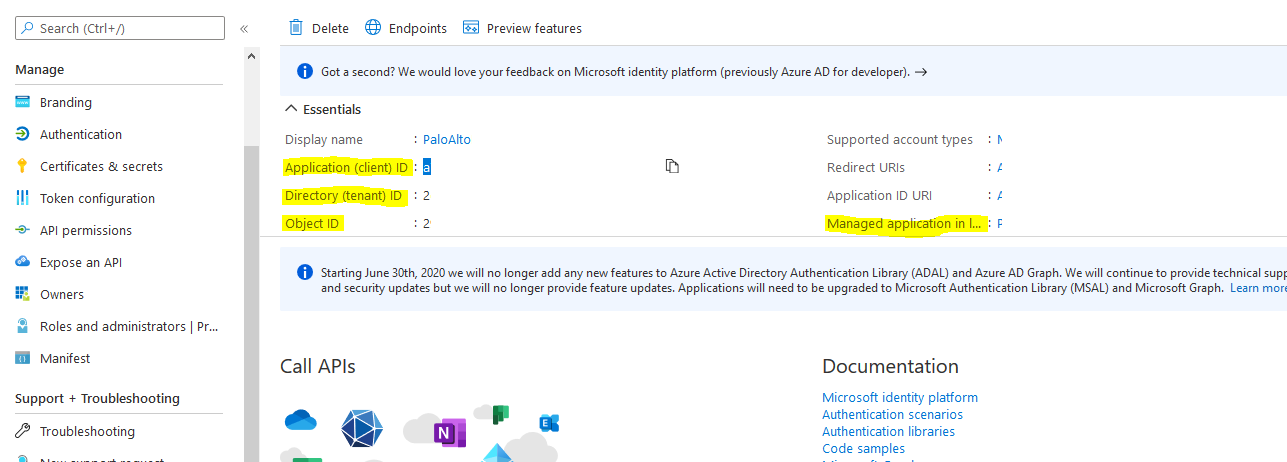 5- Next step is to create a Key secret, go to Certificates & Secret > Client Secret > New Client Secret 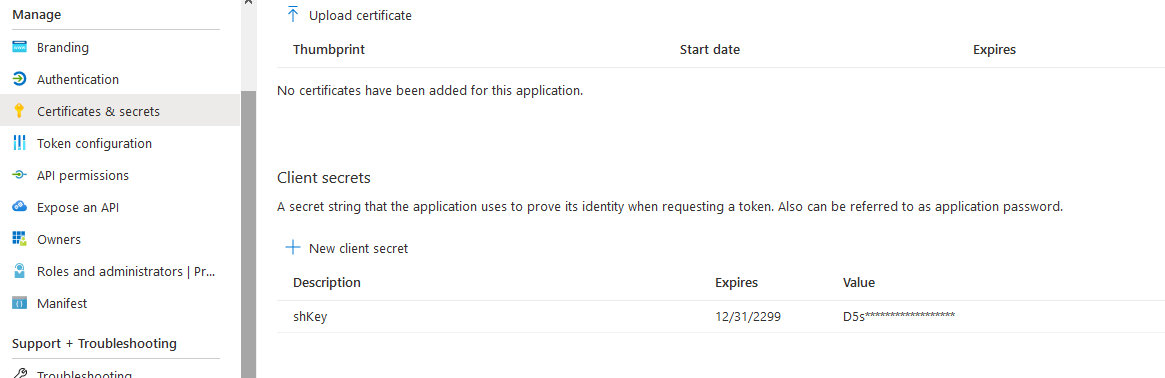 6- Enter the Client Description and I Recommended to set the Expires Value "Never" 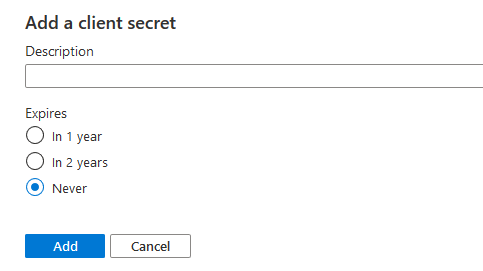 7- Next Step is to Add API Permissions, from API Permissions > + Add a Permission > Select Microsoft Graph 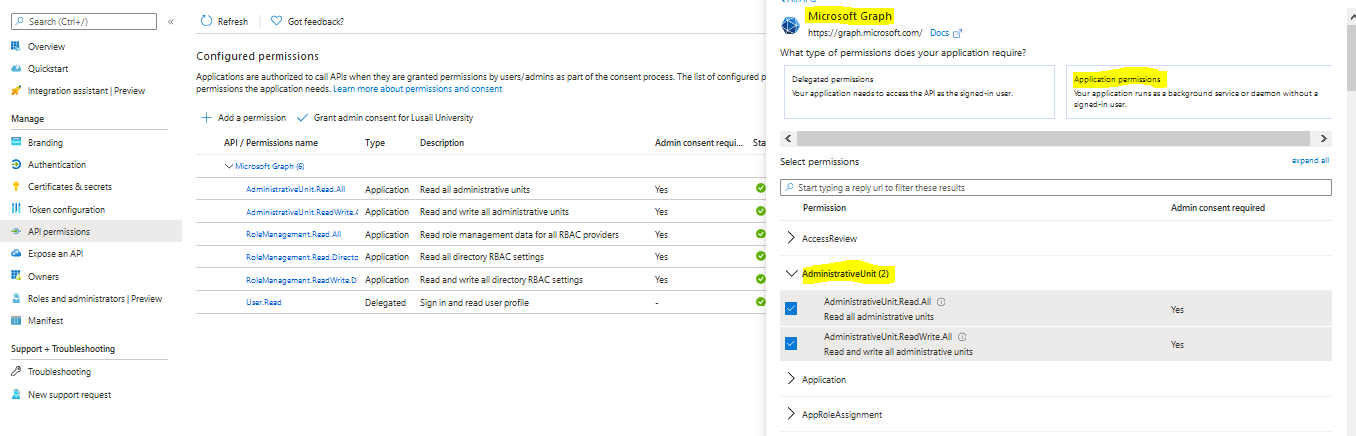 8- Add the permissions as above figure 9- After that, we need to add permissions on the subscription level for the deployed APP 10- Go to Home > Subscriptions  11- Access Control (IAM) > +Add > Add Role Assignment  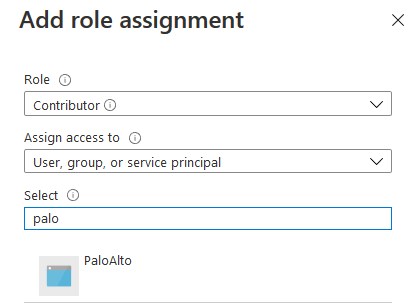 12- Select Contributor Role and from Select > select the App name 13- Done. Now We will Add the new Floating IP on the Node 1 1- Go to the Palo Alto VM Node 1 > Select Networking 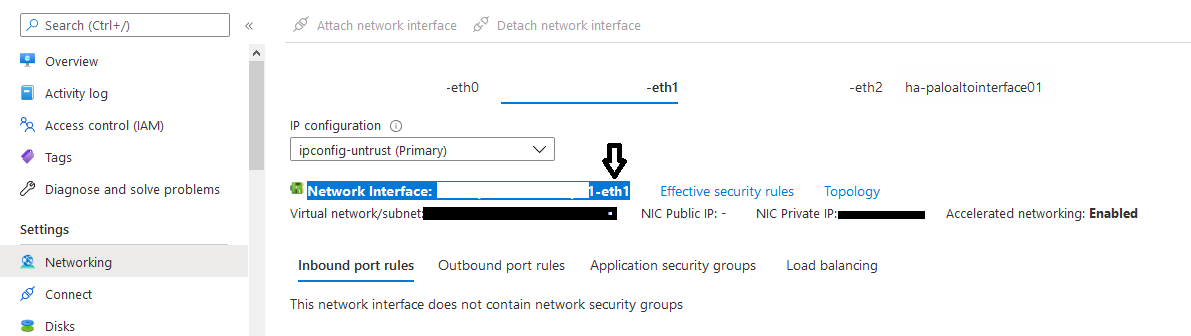 2- You will see the 4 Network interfaces which we have added before 3- Click on the Untrust "Second NIC" > a new windows will open 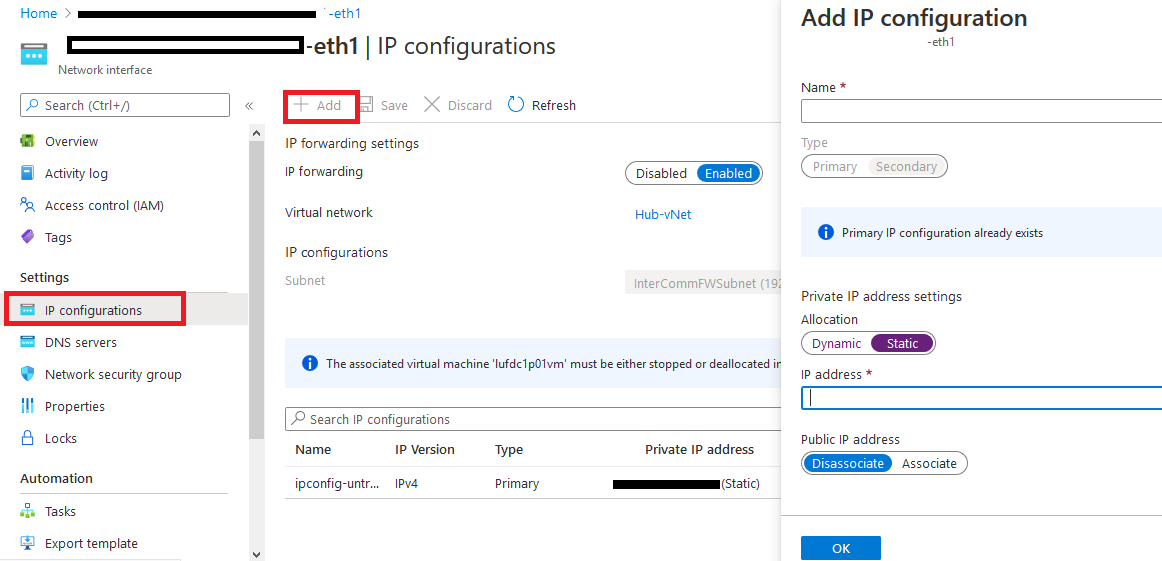 4- From IP Configurations > Click on Add 5- Enter the Private floating IP Name e.g 192.168.10.100 6- Click on Create 7- Repeat the Steps for the Trust NIC as Well Note: With floating IP address, it can quickly move the IP address from the active firewall to the passive firewall during failover. You will also need HA links – a control link and data link to synchronize data and maintain state information between the peers for the passive firewall to seamlessly secure traffic as soon as it becomes the active peer. 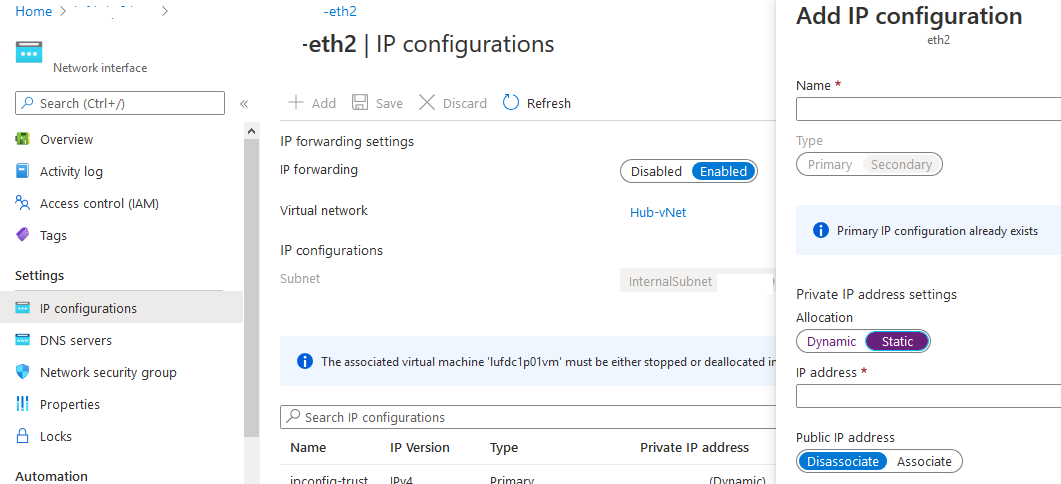 Next Step is to Login to Palo Alto Firewall and start the initial configuration and it will be the last Part :)
5 Comments
Edor ghzabli
10/13/2020 06:23:54 pm
Good explanation, waiting part 3 👍
Mostada Shahat
10/15/2020 01:30:23 am
Well done 10/24/2022 07:16:00 pm
I reviewed your blog it's really good. thanks a lot for the information about this blog. I want more information. Leave a Reply. |
Author
Mohammad Al Rousan is a Microsoft MVP (Azure), Microsoft Certified Solution Expert (MCSE) in Cloud Platform & Azure DevOps & Infrastructure, An active community blogger and speaker.
Al Rousan has over 8 years of professional experience in IT Infrastructure and very passionate about Microsoft technologies and products. 
Top 10 Microsoft Azure Blogs
Archives
September 2023
Categories
All
|
 RSS Feed
